
Make your own bulletin board
I’m an original person. This carries over to
everything I do. My kids have unique names that they won’t find on anything
personalized. But at the end of the day, I still need the same things that everyone else
does, chairs, a desk, lamps and a bulletin board.

The bulletin board is what I’m going to focus on in this post. I
could have bought a bulletin board from an office department store and found
plenty of options on sizes and shapes. It would still be the same thing you
would find in someone else’s work space. I needed to find a way to make
something like that unique. I believe I succeeded.
.jpg) Hobby Lobby is my home away from home. If I’m prepping any kind
of craft, Hobby Lobby or at least their website is where I begin the
search. Since I’m not planning on
hanging anything more substantial than some photos, post-it’s or a postcard,
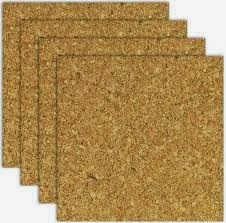
the weight and thickness of the cork was not an issue to me. I knew I wanted to
have some design options to play with. So I found some small, coaster-sized
cork boards. Each package came with 4 and I found circle and square designs, so
I bought a few of each.
Hobby Lobby is my home away from home. If I’m prepping any kind
of craft, Hobby Lobby or at least their website is where I begin the
search. Since I’m not planning on
hanging anything more substantial than some photos, post-it’s or a postcard,
the weight and thickness of the cork was not an issue to me. I knew I wanted to
have some design options to play with. So I found some small, coaster-sized
cork boards. Each package came with 4 and I found circle and square designs, so
I bought a few of each. .jpg)

Next I needed to have thumbtacks but, once again, didn’t want
them to be boring. So I decided to make my own. I found some great designed
bottle caps at Hobby Lobby that just so happened to be on sale that day. I
needed some flat thumbtacks that had a long enough point to reach the depth of
the bottle cap easily.

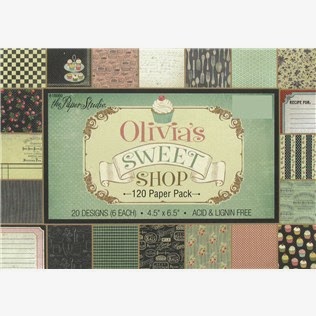 Last to search for was the paper or fabric I wanted to cover the
cork boards with. I found a small scrapbook paper pack that went well with the
bottle cap design. I purchased some spray adhesive and made sure I had glue
sticks for my glue gun.
Last to search for was the paper or fabric I wanted to cover the
cork boards with. I found a small scrapbook paper pack that went well with the
bottle cap design. I purchased some spray adhesive and made sure I had glue
sticks for my glue gun. 
Prep your work surface. Be prepared for sticky residue and
X-Acto knife cutting. All that is left is to assemble them. It’s a fairly straight
forward process. The one thing I would encourage if you’re going to try these
yourself, is to definitely use the spray adhesive. I considered just using my
glue gun. The paper would stick, definitely, but the finish would not be smooth
and even. I know if I felt bumps from the glue, even with them hanging on a
wall, it would drive me crazy. It didn’t take much to do the boards and
afterwards I had a mostly full can of spray adhesive to use on other projects. Definitely
more than worth the investment of about $7.00.
There are several ways you can measure and cut the paper to
apply it. With the size of the small stack of scrapbook papers I started with
there wouldn’t be a lot of extra from using one page. I still have to hang on
to what is left because I can always get a stamp or punch of some kind out of
even the smallest scraps. Even with that drive, I could stand to lose a few
inches on the sides. I picked the papers I wanted to use and made note of any
designs I wanted to be sure that made it onto the finished product. I accounted
for both circle and square designs to make sure I had these exactly how I
wanted.
If I had cut the exact size of the coaster before, I would have
messed up and glued it off by a few centimeters that would have made me need to
restart. I used an empty box I had laying around the house and worked one piece
at a time. I laid the coaster in the box, held the can about 6 inches away and
sprayed an even coat of adhesive over it.
Then I went to work on placing the paper. I made sure I got it
as even as I could and included the little design details on the papers. Then I
laid it aside and continued until all boards have paper attached.
I went through with scissors and cut down the extra edges, using
an X-Acto knife if necessary.
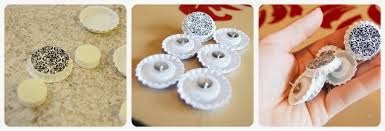
Onto the thumbtacks! This was also fairly straight forward. Some
of the bottle caps came with a rounded piece of foam that fit inside the back.
I glued those into place then glued my flat thumbtacks on top of that. The
bottle caps that did not have foam pieces, I simply hot glued the thumb tack
onto the back. I learned part way through that if I could find a longer flat
thumbtack point it gave me more to press into the board. But mine work just
fine with having a shorter amount.
Then all that was left to do was stick an adhesive patch to my
coaster and organize them on the wall as I wanted. Not what everyone would like
and it wouldn’t hold up to heavy use, but it’s good enough for me right now.

*One note about the material you use to cover the cork board. If
you use paper, like I did, be prepared to see each hold you punch into the
paper when you move a tack. Fabric is much more forgiving in this area, but I
wanted the colors I could find in the paper pack, plus I already had it at
home. Saving money is never wrong!

Show me some examples of different ideas you’ve had for bulletin
board designs, I have more rooms to put some in!
No comments:
Post a Comment